Zephyr SDK Installation
Click the Zephyr SDK Management card to access SDK installation. The SDK provides cross-compilation toolchains for various architectures (ARM, x86, RISC-V, etc.).
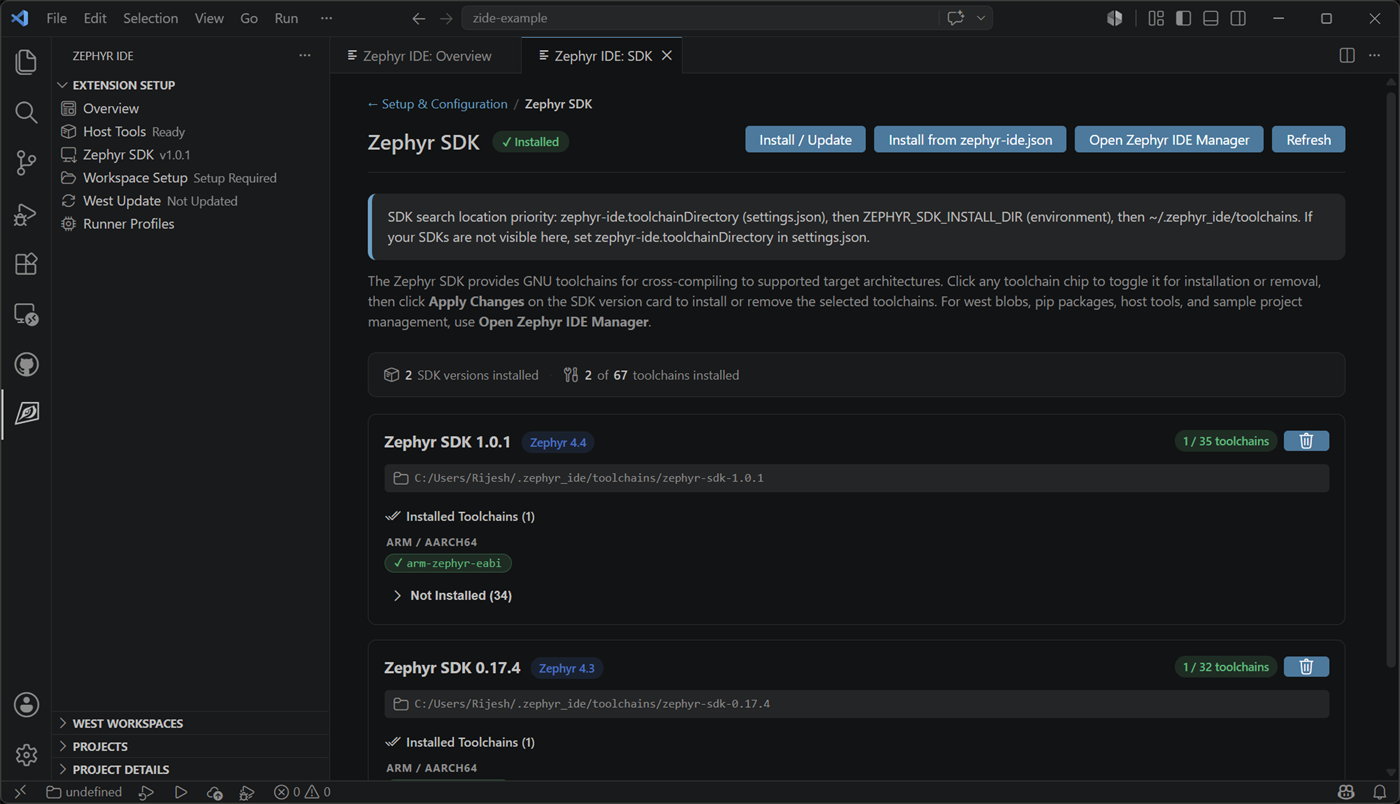
SDK Management
Section titled “SDK Management”The extension uses West’s SDK integration for version management:
- Select which SDK versions to install
- Install multiple SDKs for different architectures
- Manage SDK updates through the extension
Installation
Section titled “Installation”For new users:
- Click the Zephyr SDK Management card
- Select the latest SDK version
- Choose architectures to install (or select all for convenience)
- Click Install SDK
You can add specific architectures later if storage is a concern.
Important Notes
Section titled “Important Notes”- SDK installation is a one-time process per computer
- SDKs can be shared across multiple projects
- SDK installation uses the west SDK command
- A west workspace must be configured before SDK management can occur
Declaring Required Toolchains in zephyr-ide.json
Section titled “Declaring Required Toolchains in zephyr-ide.json”To make a project reproducible across machines and contributors, you can
declare the toolchains your workspace requires directly in
.vscode/zephyr-ide.json:
{ "toolchains": ["arm-zephyr-eabi", "riscv64-zephyr-elf"], "sdkVersion": "0.17.0", "projects": {}}sdkVersion is optional. When the workspace setup flow needs to install a
Zephyr SDK to satisfy the declared toolchains, it picks the version to install
in this priority order:
- The
sdkVersiondeclared inzephyr-ide.json. - The version recorded in the Zephyr source tree’s
SDK_VERSIONfile. - Any Zephyr SDK that is already installed locally.
- The latest released SDK if none of the above is available.
The SDK panel always exposes two buttons for managing the workspace’s declared toolchain list:
- Install from zephyr-ide.json — install every declared toolchain that isn’t already available locally.
- Modify zephyr-ide.json — open a quick-pick that lets you check or
uncheck toolchains. Toolchains already installed locally are listed first;
items currently declared in
zephyr-ide.jsonare pre-checked. Saving with no items selected clears thetoolchainsfield.
When the toolchains list is non-empty, the workspace setup flow installs
any missing toolchains automatically once the Zephyr SDK is in place.
The same operations are available from the command palette:
Zephyr IDE: Modify zephyr-ide.json ToolchainsZephyr IDE: Install Toolchains from zephyr-ide.json
See the full field reference at .vscode/zephyr-ide.json schema.
Declaring Required Blobs in zephyr-ide.json
Section titled “Declaring Required Blobs in zephyr-ide.json”Some Zephyr modules ship binary blobs (e.g. wireless firmware) that must be
fetched separately with west blobs fetch. Modules whose blobs your workspace
requires can be listed under the blobs key:
{ "blobs": ["hal_nordic", "hal_st"], "toolchains": ["arm-zephyr-eabi"], "projects": {}}When the workspace is set up the extension runs west blobs fetch <module> for
each declared module. You can also manage blobs interactively via:
Zephyr IDE: Modify zephyr-ide.json Blobs— opens a quick-pick listing modules that declare blobs (discovered viawest blobs list); already declared modules are pre-checked.Zephyr IDE: Install Blobs from zephyr-ide.json— fetches any blobs declared inzephyr-ide.json.
Declaring Required Pip Packages and Requirements in zephyr-ide.json
Section titled “Declaring Required Pip Packages and Requirements in zephyr-ide.json”Additional Python packages can be declared under the pipPackages key and
additional requirements.txt files can be declared under pipRequirements.
Both are installed together into the workspace’s virtual environment after
workspace setup, once you confirm the install prompt (or when you explicitly
run the install action from the manager panel or command palette):
{ "pipPackages": ["dtsh", "pyocd"], "pipRequirements": [ "external/nrf/scripts/requirements.txt", "external/bootloader/mcuboot/boot/zephyr/scripts/requirements.txt" ], "toolchains": ["arm-zephyr-eabi"], "projects": {}}The extension always installs dtsh and pyocd (used for devicetree shell
and CMSIS-DAP flashing/debugging). Packages listed under pipPackages and
paths listed under pipRequirements are installed in addition to those
defaults.
Paths in pipRequirements may be relative to the workspace root or absolute,
must end in .txt, and relative paths must not contain path traversal
components (..).
During workspace setup, the extension installs Zephyr’s own Python
requirements (west packages pip with fallback to
pip install -r <zephyr>/scripts/requirements.txt) plus required IDE tools.
After that, if zephyr-ide.json declares pipPackages and/or
pipRequirements, the extension prompts to install them together in one step.
To manage these fields interactively, open the Zephyr IDE Manager panel or use the command palette commands:
- Zephyr IDE: Modify zephyr-ide.json Pip Packages
- Zephyr IDE: Modify zephyr-ide.json Pip Requirements
- Zephyr IDE: Install Pip Packages and Requirements from zephyr-ide.json
Next Steps
Section titled “Next Steps”After installing the SDK, you’re ready to: