Workspace Configuration
Click the Workspace card to configure your west workspace. Choose to set up a workspace in the current VS Code folder or an external directory.
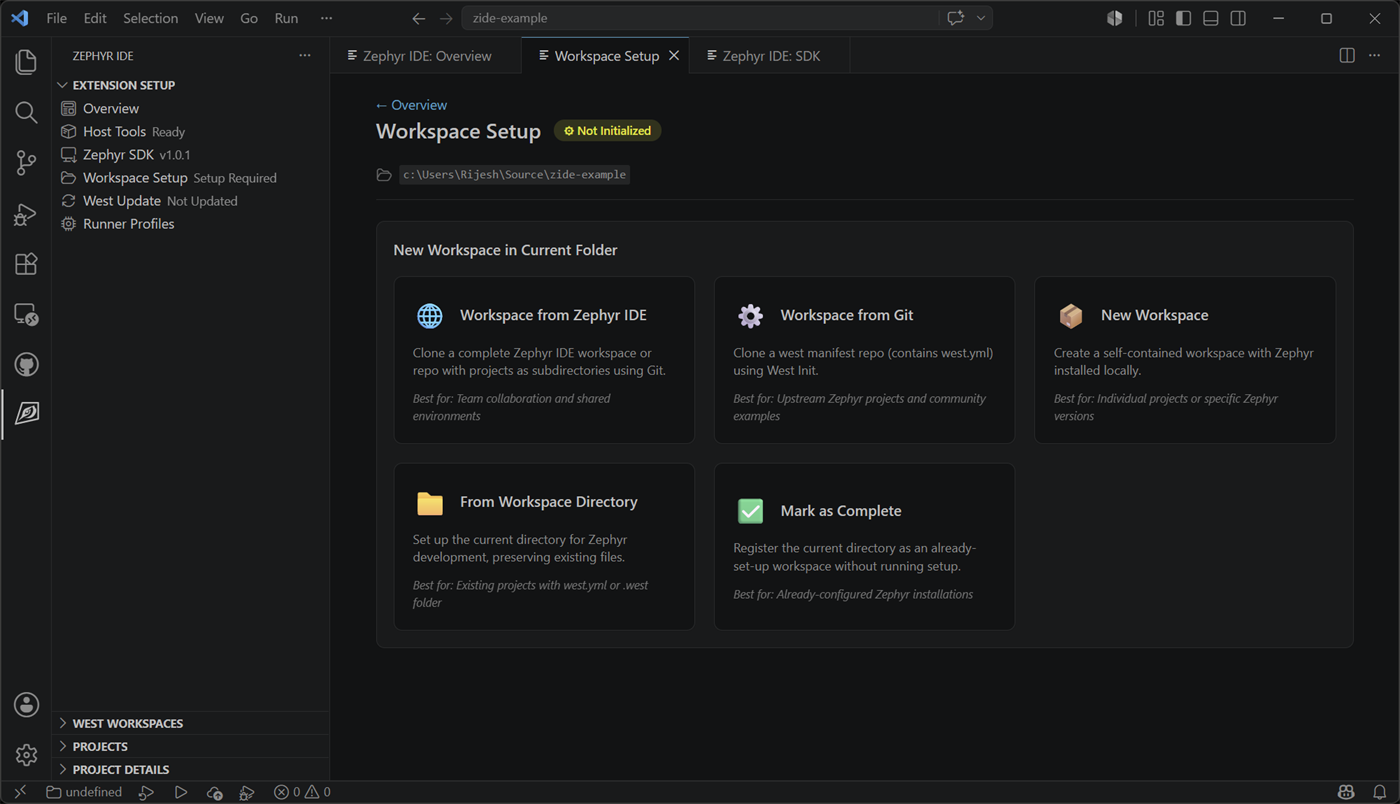
Workspace Setup Methods
Section titled “Workspace Setup Methods”1. IDE for Zephyr Workspace from Git
Section titled “1. IDE for Zephyr Workspace from Git”Clone a repository that contains a pre-configured IDE for Zephyr workspace setup. This is useful when working with a team project that already has IDE for Zephyr configured.
2. West Workspace from Git
Section titled “2. West Workspace from Git”Clone a west-based Zephyr repository from Git. This allows you to start with an existing west project.
3. Standard Workspace
Section titled “3. Standard Workspace”Create a fresh workspace in the current folder with:
- Python virtual environment setup
- West installation
- Zephyr repository initialization
- Optional: Choose between minimal or full Zephyr installation (minimal is recommended for faster setup)
4. Open Current Directory
Section titled “4. Open Current Directory”Use the current folder as a west workspace. When selected, you can choose how to configure it:
- Use .west folder - Use an existing
.westconfiguration in the directory (recommended if already initialized) - Use west.yml file - Use an existing
west.ymlmanifest file - Create new west.yml - Create a new manifest file for a fresh workspace
- Use external Zephyr installation - Link to an externally managed Zephyr installation
5. External Directory
Section titled “5. External Directory”Use Zephyr IDE: Setup Workspace from External Directory when the workspace you want to register is not the folder currently open in VS Code.
This is useful when:
- You keep west workspaces outside your editor checkout folder
- You use one
.code-workspacefile to point at multiple repositories - You want IDE for Zephyr to manage a shared workspace without reopening VS Code in that directory
Vendor Configurations
Section titled “Vendor Configurations”When you choose Create new west.yml, the west selector also includes Vendor Configurations. Vendor entries are registered by ID and metadata, and each vendor template provides:
west.yml(required) — copied into your workspace as the manifesthost-tools.json(optional) — additional host tools prompted during setup
This vendor data is provided by the extension (resources/vendors/vendors.json and resources/vendors/<vendor-id>/) and is not stored in .vscode/zephyr-ide.json.
Workspace Setup Process
Section titled “Workspace Setup Process”When setting up a new workspace, the extension will:
- Setup West Environment - Create a Python virtual environment and install west
- West Init - Initialize the workspace with a west.yml manifest file
- West Update - Clone Zephyr and its dependencies into the workspace
- Install Python Packages - Install Zephyr’s
requirements.txtand any additional packages or requirements files declared inzephyr-ide.jsonpipPackages/pipRequirementsinto the virtual environment
The folder structure after setup will typically look like:
workspace/+-- .west/ # West configuration+-- .venv/ # Python virtual environment+-- zephyr/ # Zephyr RTOS source+-- modules/ # Zephyr modules and dependencies+-- your-app/ # Your application folder (with west.yml)Configured Workspace
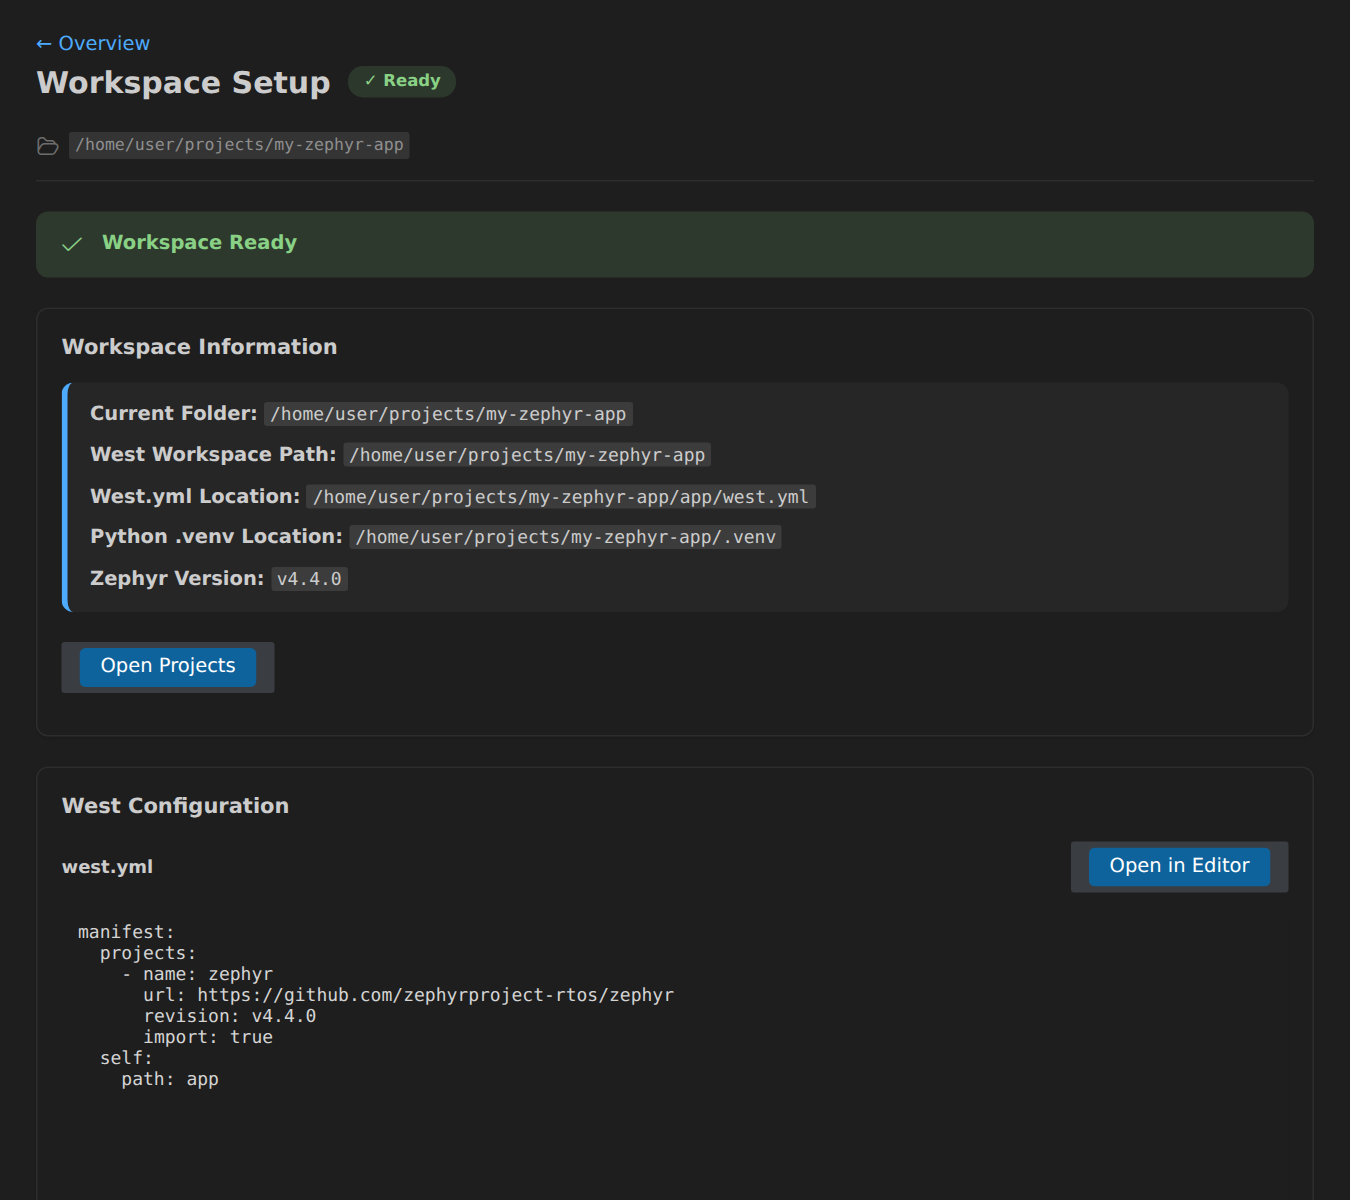
Section titled “Configured Workspace”Once configured, the workspace panel will display your workspace information and allow you to directly update the west.yml file:
Workspace Lifecycle and Recovery
Section titled “Workspace Lifecycle and Recovery”Once a workspace has been registered, these commands help you manage it over time:
Zephyr IDE: Deactivate Workspace- Stop using the current workspace for this window, but keep it in the registry so it can be selected again later.Zephyr IDE: Unregister Workspace- Remove a workspace from the extension’s registry entirely.Zephyr IDE: Re-run West Setup- Re-run the west setup/update flow for the active workspace after changing manifests or recovering a partial setup.Zephyr IDE: Reset Workspace- Clear workspace configuration and start the setup flow again from scratch.Zephyr IDE: Reset Active Installation- Clear the current Zephyr installation selection when switching between managed and external environments.
If you are intentionally managing west outside the extension, Zephyr IDE: Skip West Setup marks the workspace as ready without re-running initialization.